*THIS TUTORIAL IS FOR PERSONAL, NOT COMMERCIAL, OR RE-SALE PURPOSES*
This ruffled throw design is the intellectual property of Abby Metz. Please contact Metz Interiors if you are interested in purchasing licensing rights for this design.
I recently finished a bedroom makeover that included this ruffled throw I designed for the foot of the bed which I absolutely loved! It added great texture, colour and interest to the room. While not expensive or complicated to make, it did take hoards of fabric, thread, time and patience! Here's how I did it:
Materials:
To make 2.5' wide, 9' long throw (enough for decorative foot of queen-sized bed), if you want to make a full bedspread, you will need much more:
- 2 King - sized sheets
- 4 spools of thread (or more)
Procedure:
(There are a few ways to do this, I'll describe the fastest/easiest way and give suggestions for more finished alternate versions)
1) Cut 2.5' (+ enough for hem) wide strip from bottom of 1 king sized sheet to use as base:
2) Cut the rest of the length of the material into 6 inch strips:
3) Join 2 strips together. Hem ends and 1 side of the length of the strip. Repeat until all the strips are joined and hemmed.
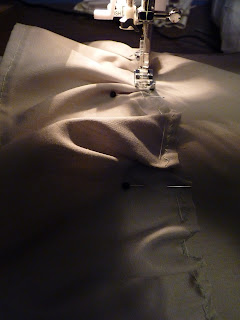
4) Gather strip along unfinished edge. Pin to bottom of base. Evenly distribute gathered strip along the length of the base - sew in place.
5) Repeat step 4, overlapping the gathered strips by 1/3 to 1/2 until base is covered, leaving at least 1 inch for top hem.
6) Hem top edge, and celebrate finally being done!
Alternate options:
1) Step 4: pin and sew gathered strip in such a way so that when the ruffled is flipped over into correct position, messy edge attatched to the base of the fabric is hidden underneath the ruffle.
2) Step 3: Hem both sides of the strip and proceed with the rest of the instructions for a more finished look.
3) Step 1: cut material base into 5 inch strips.
Step 4: sew gathered strip in-between 2 flat strips from the base. Repeat until all strips are joined.
Step 6: finish with a lining to hide messy underside.
*This way would be ideal if you want to make something larger like a duvet cover.*
OR . . .
If you don't want to spend the time and energy to make one for yourself, I would LOVE to make one for you! Check out my Etsy shop at: http://www.etsy.com/shop/metzinteriors


