
Materials:
- Old piece of furniture
- butter knife (totally professional tool I know - but it works!)
- flat-head screw driver
- pliers
- staple gun
- hammer
- sewing machine
- regular and zipper foot
- seam ripper
- upholstery fabric
- plastic piping
- iron
I'm not a pro at this by any means (in fact this was my first attempt), but here's what worked:
The basic rule of thumb is that you work one section at a time, take off the old fabric in whole pieces, then use those pieces as a pattern for your new pieces. Pay attention to how things come off - because you'll put the new pieces back on the same way.
1) Remove Staples:
Starting from the bottom of the furniture, remove the staples using your butter knife, flat-head screw driver, and pliers (safety goggles are a good idea). Remove bottom covering (keep aside until later), and release the rest of the fabric from the bottom of the furniture frame.
2) Remove Fabric Section:
In this case I began by loosening the side sections and removed the back piece of fabric from the chair frame (put aside with metal stretchers), and then removed the lower-front section of fabric, saving any pieces of piping that also had to come off. If any piece is sewn directly onto the furniture, you may need a seam ripper to release it.
 3) Iron Out Old Fabric Section & Trace:

Once I had the fabric piece removed I ironed it flat, and then traced it out exactly onto my new fabric. Cut out new fabric piece. (If you're using patterned fabric - make sure you have your piece in line with the direction of the fabric pattern before cutting it out)
4) Attach New Fabric Piece:
Place new fabric piece on furniture frame in place of the old one and sew/ staple to frame in the same manner as the old one.


5) Repeat with other sections:After replacing the lower-front piece, I worked on the sides next. In this case the side pieces consisted of 1 whole jacket composed of several pieces sewn together. I removed the entire jacket and used my seam-ripper to detatch the pieces from one another.
 Then I ironed each piece out, traced it out onto my new fabric, sewed them back together in the same way, replaced the jacket onto the side of the chair and stapled into position on the frame.
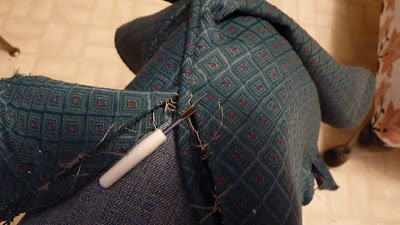
Piping:
To make piping:
1) Remove plastic piping from old fabric sleeve (if piping cannot be re-used, cut a new piece of piping to the same size).
2) Cut a piece of new fabric long and wide enough to make a new sleeve for the piece of piping. Fold in half lengthwise and iron to crease. Sew sleeve just narrow enough to fit piping snuggly.


3) Insert piping.

4) Sandwich between right sides of fabric pieces with piping on the inside - raw edge to the outside and pin in place.

5) Sew pieces together using a zipper-foot on your sewing machine.

After I completed the sides, I repeated the process with the upper-front section, and then the back piece.


Again the rule here is put it back on the way it was, so take careful note when you pull it off. Position fabric stretchers on back side of fabric pointy side down, and poke through material.
 Fold fabric over, position on frame firmly (right side up) and hammer in, stretching fabric across the back.


6) Replace Bottom Covering:

Staple bottom covering onto furniture frame the way it was - tucking in any loose ends.
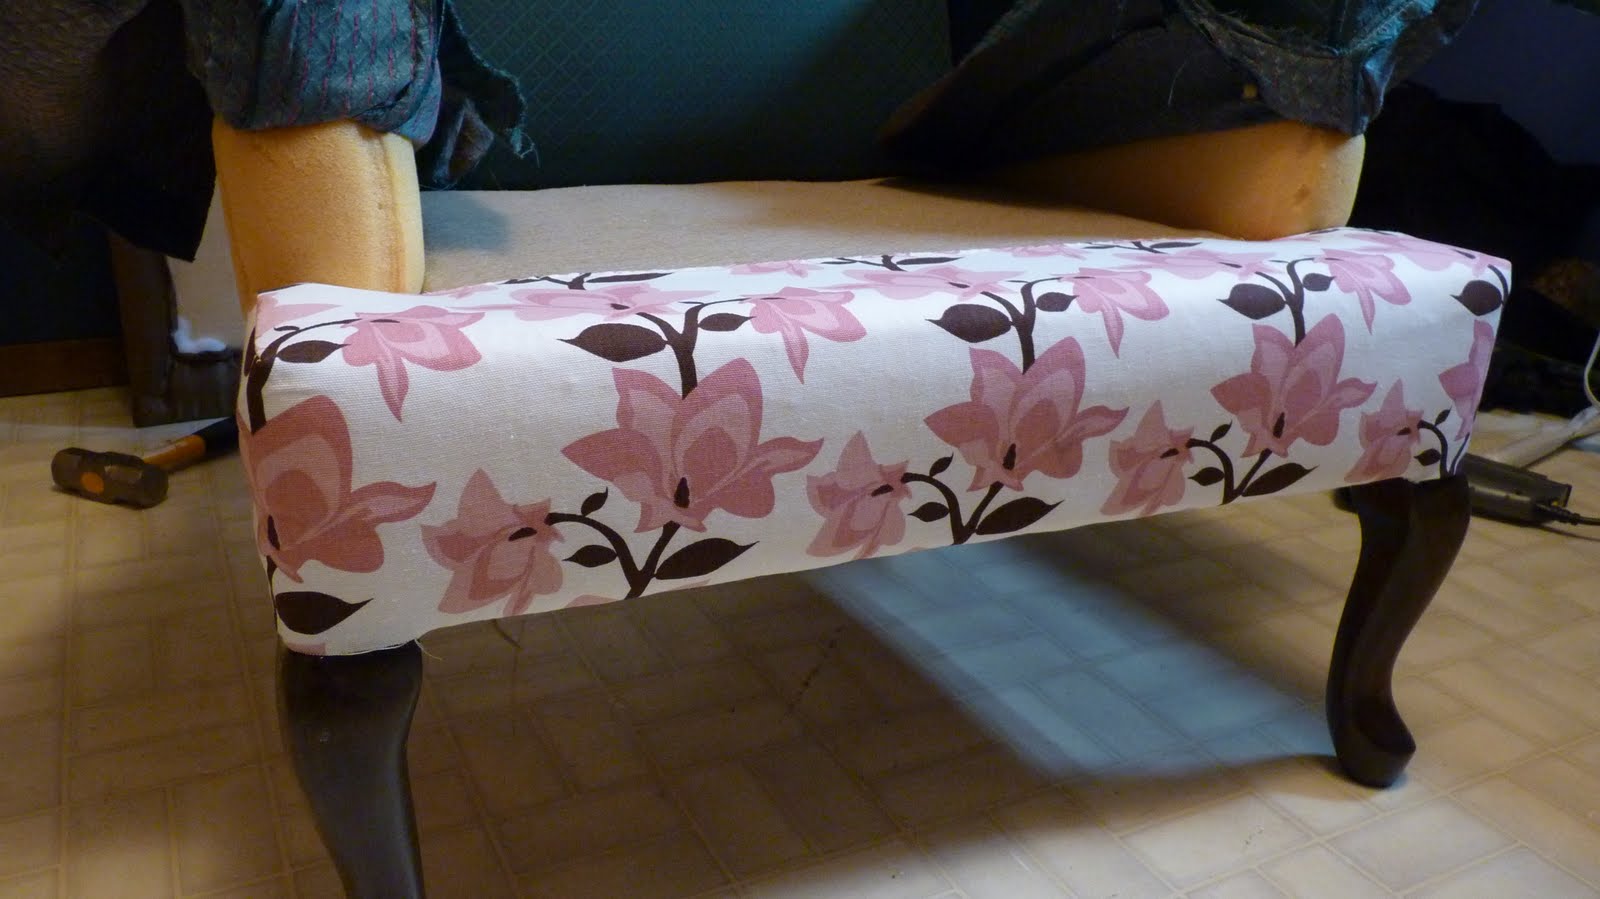
7) Enjoy your "new" furniture!

Credited to the Author
- Old piece of furniture
- butter knife (totally professional tool I know - but it works!)
- flat-head screw driver
- pliers
- staple gun
- hammer
- sewing machine
- regular and zipper foot
- seam ripper
- upholstery fabric
- plastic piping
- iron
I'm not a pro at this by any means (in fact this was my first attempt), but here's what worked:
The basic rule of thumb is that you work one section at a time, take off the old fabric in whole pieces, then use those pieces as a pattern for your new pieces. Pay attention to how things come off - because you'll put the new pieces back on the same way.
1) Remove Staples:

Starting from the bottom of the furniture, remove the staples using your butter knife, flat-head screw driver, and pliers (safety goggles are a good idea). Remove bottom covering (keep aside until later), and release the rest of the fabric from the bottom of the furniture frame.
2) Remove Fabric Section:

In this case I began by loosening the side sections and removed the back piece of fabric from the chair frame (put aside with metal stretchers), and then removed the lower-front section of fabric, saving any pieces of piping that also had to come off. If any piece is sewn directly onto the furniture, you may need a seam ripper to release it.
 3) Iron Out Old Fabric Section & Trace:

Once I had the fabric piece removed I ironed it flat, and then traced it out exactly onto my new fabric. Cut out new fabric piece. (If you're using patterned fabric - make sure you have your piece in line with the direction of the fabric pattern before cutting it out)
4) Attach New Fabric Piece:
Place new fabric piece on furniture frame in place of the old one and sew/ staple to frame in the same manner as the old one.


5) Repeat with other sections:After replacing the lower-front piece, I worked on the sides next. In this case the side pieces consisted of 1 whole jacket composed of several pieces sewn together. I removed the entire jacket and used my seam-ripper to detatch the pieces from one another.
 Then I ironed each piece out, traced it out onto my new fabric, sewed them back together in the same way, replaced the jacket onto the side of the chair and stapled into position on the frame.
To make piping:
1) Remove plastic piping from old fabric sleeve (if piping cannot be re-used, cut a new piece of piping to the same size).
2) Cut a piece of new fabric long and wide enough to make a new sleeve for the piece of piping. Fold in half lengthwise and iron to crease. Sew sleeve just narrow enough to fit piping snuggly.


3) Insert piping.

4) Sandwich between right sides of fabric pieces with piping on the inside - raw edge to the outside and pin in place.

5) Sew pieces together using a zipper-foot on your sewing machine.

After I completed the sides, I repeated the process with the upper-front section, and then the back piece.


Using Fabric Stretchers:
Again the rule here is put it back on the way it was, so take careful note when you pull it off. Position fabric stretchers on back side of fabric pointy side down, and poke through material.
 Fold fabric over, position on frame firmly (right side up) and hammer in, stretching fabric across the back.


6) Replace Bottom Covering:

Staple bottom covering onto furniture frame the way it was - tucking in any loose ends.
7) Enjoy your "new" furniture!

Credited to the Author